
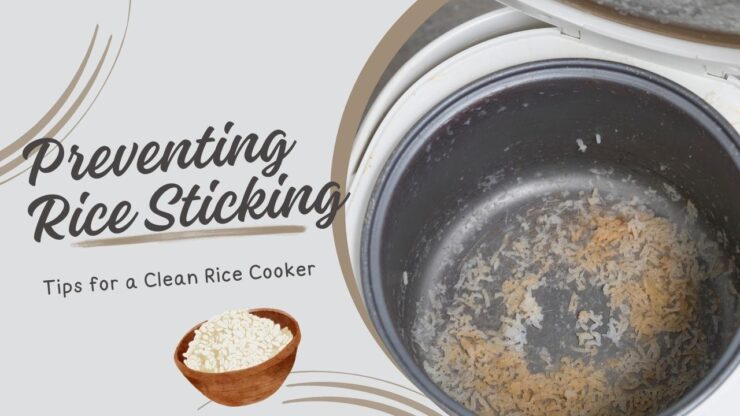
Imagine this: You’ve just prepared a delectable meal, the fragrant aromas filling your kitchen, and now all that’s left is to serve the perfectly cooked rice from your rice cooker. However, as you scoop it out, you find a thick layer of rice stubbornly stuck to the bottom. It’s a common problem, experienced by both novices and seasoned cooks, turning a pleasant dining experience into an ordeal.
Our journey to conquering this culinary challenge will take us through several steps: choosing the right type, rinsing and soaking, perfecting the water-to-rice ratio, using non-stick cookers or oil, resisting the temptation to open the cooker prematurely, letting the grains rest, fluffing with a fork, prompt removal after cooking, and thorough cleaning. Now, let’s delve into each one.
Choose the Right Type
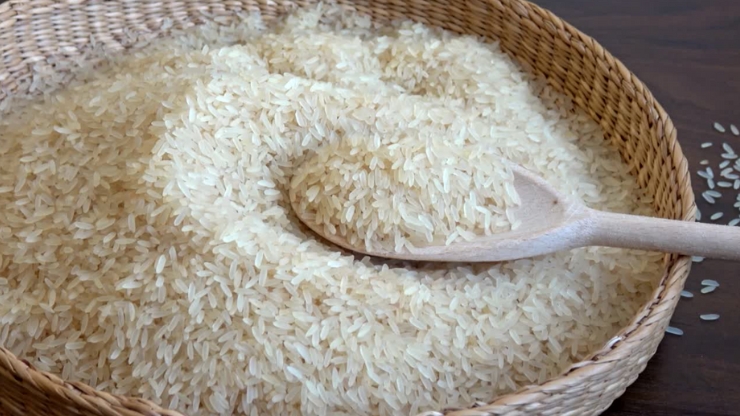
Choosing the right type of rice for your meal is the first step towards perfect, non-sticky rice. Different types have varying starch contents and require different cooking methods, affecting how much they stick. For example, long grains like Basmati or Jasmine have less sticky starch and are less likely to stick to the pot than short-grain varieties such as sushi or Arborio rice.
Each type imparts a unique texture and flavor to your meals, so it’s essential to understand their characteristics before cooking. For instance, Basmati is perfect for biryanis and pilafs, offering individual, non-sticky grains, while the creamy, stickier Arborio is the star of a risotto dish.
Understanding the cooking requirements of different types can make a world of difference. Depending on the type, it might need more or less water, a longer soaking time, or a specific cooking duration to prevent it from sticking. It’s all about adapting to the needs of your chosen rice.
Rinse It
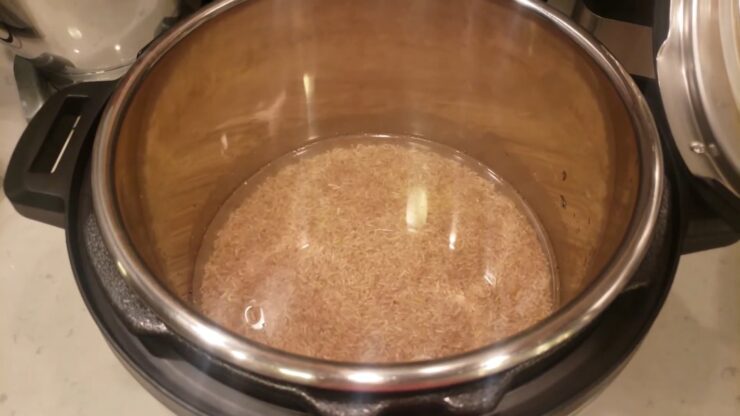
Rinsing it before cooking can significantly help in reducing stickiness. The rinsing process helps remove the excess surface starch, which is a major contributor to the grains sticking together, and consequently to the pot. To rinse your rice effectively, place it in a large bowl and run cold water over it. Use your hands to gently stir the grains, allowing the water to turn cloudy with the starch.
Drain the water and repeat the process until the water is clear. It might take a few cycles, but it’s worth the effort. Rinsing not only prevents sticking but also helps improve the texture and taste. By removing the extra starch, it becomes fluffier and less glue-like, delivering a much better eating experience. However, keep in mind that some types, like Arborio, should not be rinsed to preserve the starch needed for a creamy texture.
Use the Correct Water-To-Rice Ratio
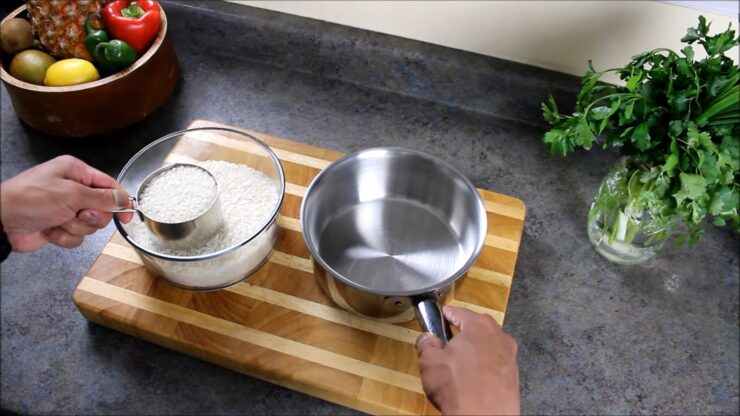
One of the most crucial aspects of cooking perfect rice is the water-to-rice ratio. Too much water can make it mushy and sticky, while too little can cause it to dry out and stick to the pot. This delicate balance might need a little experimenting to master, as different types and rice cookers might require adjustments. The general rule of thumb is a 2:1 water-to-rice ratio for most varieties, meaning 2 cups of water for every cup of rice.
However, this ratio can vary. For instance, long-grain varieties like Basmati may need less water, while short-grain types might require more. Be sure to check the package instructions for a starting point and adjust based on your preferences. Remember, the amount of water isn’t the only factor influencing the texture of it. The size of your cooker, cooking time, and even altitude can affect the outcome. The key is to observe and tweak until you hit that sweet spot for your perfect bowl of rice.
Soak It Before Cooking
This step hydrates the grains, kick-starting the cooking process, reducing overall cooking time, and helping to achieve a uniform texture. It also further eliminates excess surface starch, reducing stickiness. Different types require different soaking times. For example, while Basmati benefits from a soak of about 30 minutes, brown rice may require a few hours. Some types, like instant rice, don’t need soaking at all.
Make sure to understand the soaking needs of your chosen variety to avoid a sticky mess. After soaking, drain it thoroughly before adding fresh water for cooking. This is another opportunity to remove the last vestiges of excess starch. Your patience will be rewarded with fluffy, separated grains that sing in harmony with your main course.
Use a Non-Stick Cooker or Coat the Bottom with Oil
An excellent way to avoid it sticking to the bottom of your cooker is by using a non-stick rice cooker. These devices feature a coated inner pot that reduces the chances of sticking, saving you the frustration of stubborn, burnt rice. If a non-stick cooker isn’t an option, you can still achieve non-sticky rice by coating the bottom of your regular cooker with a thin layer of oil.
The oil creates a barrier between the rice and the pot, discouraging sticking. A light cooking spray or a tablespoon of oil evenly spread should suffice. It’s crucial to remember that while these methods can be helpful, they’re just one piece of the puzzle. You should still follow the other guidelines like rinsing, soaking, and using the correct water-to-rice ratio to ensure non-stick success.
Avoid Opening During Cooking
Resisting the temptation to open the rice cooker while it’s doing its job is an often-overlooked tip. Unsealing the cooker can disrupt the cooking process by letting out steam, affecting both the texture and the likelihood of the rice sticking to the pot. The process of cooking rice in a cooker relies heavily on steam. When you open the cooker, the temperature inside drops rapidly, affecting the rice’s cooking, possibly leading to uneven and sticky results.
It’s best to let the cooker do its job undisturbed until it’s time to fluff the rice. Bear in mind that patience is a virtue, especially when cooking rice. Trust the process, keep that lid firmly shut, and you’ll be rewarded with perfectly cooked, non-sticky grains.
Let the Rice Rest After Cooking
Once your cooker has done its job, don’t be too quick to fluff and serve. Giving the grains some rest time is a secret shared by many experienced cooks. Resting allows the moisture to redistribute throughout the pot, ensuring a uniform texture and helping to avoid a sticky bottom layer. The ideal rest time varies from 5 to 15 minutes, depending on the type and the quantity. During this time, resist the temptation to peek; the steam inside the cooker continues to do some important post-cooking work. You might be hungry, but remember, good things come to those who wait.
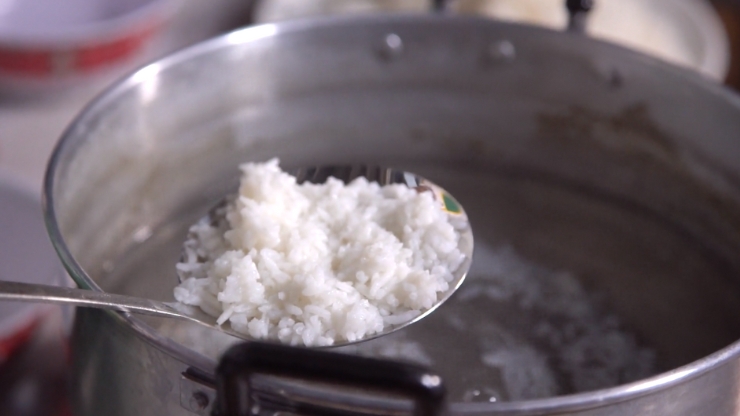
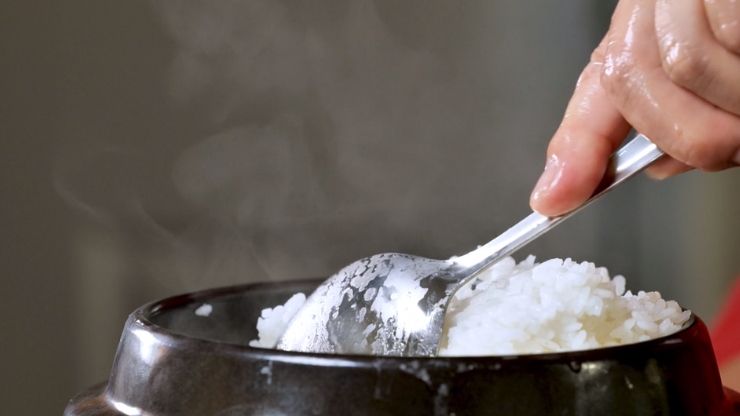
Fluff the Rice with A Fork
After allowing the grains to rest post-cooking, the next step is to fluff them gently. Fluffing helps to separate the grains, reducing stickiness, and giving them a light, pleasing texture. The key here is to use a fork or a rice paddle and not a spoon, which can potentially squash the grains, increasing stickiness. Start fluffing from the edge of the pot, gently turning it towards the center.
Be careful not to scrape the bottom too hard to avoid any stuck rice becoming mashed and sticking further. It’s a gentle art, meant to coax the grains into separation rather than force them. Properly fluffed grains not only looks and taste better but also cool more evenly. It’s a small extra step that adds a great deal of elegance to your meal, making the effort truly worthwhile.
Remove It Promptly After Cooking
Once your rice is cooked, rested, and fluffed, it’s essential to remove it from the cooker promptly. Leaving the rice sitting in the warm cooker for too long can lead to drying out and sticking, especially for the bottom layer, which continues to cook due to the residual heat. Serving it immediately not only helps avoid sticking but also ensures the optimal taste and texture of your dish.
It is at its best soon after cooking, so timely removal enhances your dining experience. In case you need to store leftovers, transfer the grains to a separate container before refrigerating. This practice will preserve the quality and make cleaning the cooker easier.
Clean the Cooker Thoroughly
Regular and thorough cleaning of your cooker is the final step in preventing it from sticking. Over time, starch residue can accumulate and harden on the pot, creating a sticky base for your next cooking session. Once you’ve removed it, allow the cooker pot to cool, then clean it using warm, soapy water and a non-abrasive sponge or cloth.
Scrub gently to avoid damaging the surface, especially if your cooker has a non-stick coating. For stubborn spots, soak the pot in warm, soapy water for a while before cleaning. Regular maintenance not only prolongs the life of your cooker but also contributes significantly to your pursuit of perfectly cooked, non-sticky rice.
Conclusion
Cooking perfect, non-sticky rice may seem like an art shrouded in mystery. However, by following these simple steps — choosing the right type, rinsing and soaking properly, using the correct water ratio, leveraging non-stick options or oil, letting the cooker do its job undisturbed, resting the rice post-cooking, fluffing carefully, removing promptly, and cleaning the cooker thoroughly — you’ll be well on your way to mastering this culinary challenge.
Remember, the joy of cooking lies in experimentation and learning. Don’t be disheartened if your first few attempts don’t yield the desired results. Keep refining your technique based on these guidelines, and soon, you’ll be serving up beautifully cooked, non-sticky rice that will be the star of any meal. So, go ahead and break free from the cycle of sticky, burnt rice. Transform your culinary experience with the simple magic of perfectly cooked, non-sticky rice. Your meals — and your taste buds — will thank you!